
📋 Placing an Order
Placing an order
This guide walks you through placing a background screening order in Scaut, from choosing the subject type to confirming and submitting the order. The flow has six steps: Type, Scope, Subjects, Countries, Checks, and Review.
Step 1: Choose the subject type
You can start a new order in two ways:
- From the Home page, use the Start an assessment card at the top and click the subject type you need.
- Or click New order in the top left corner.
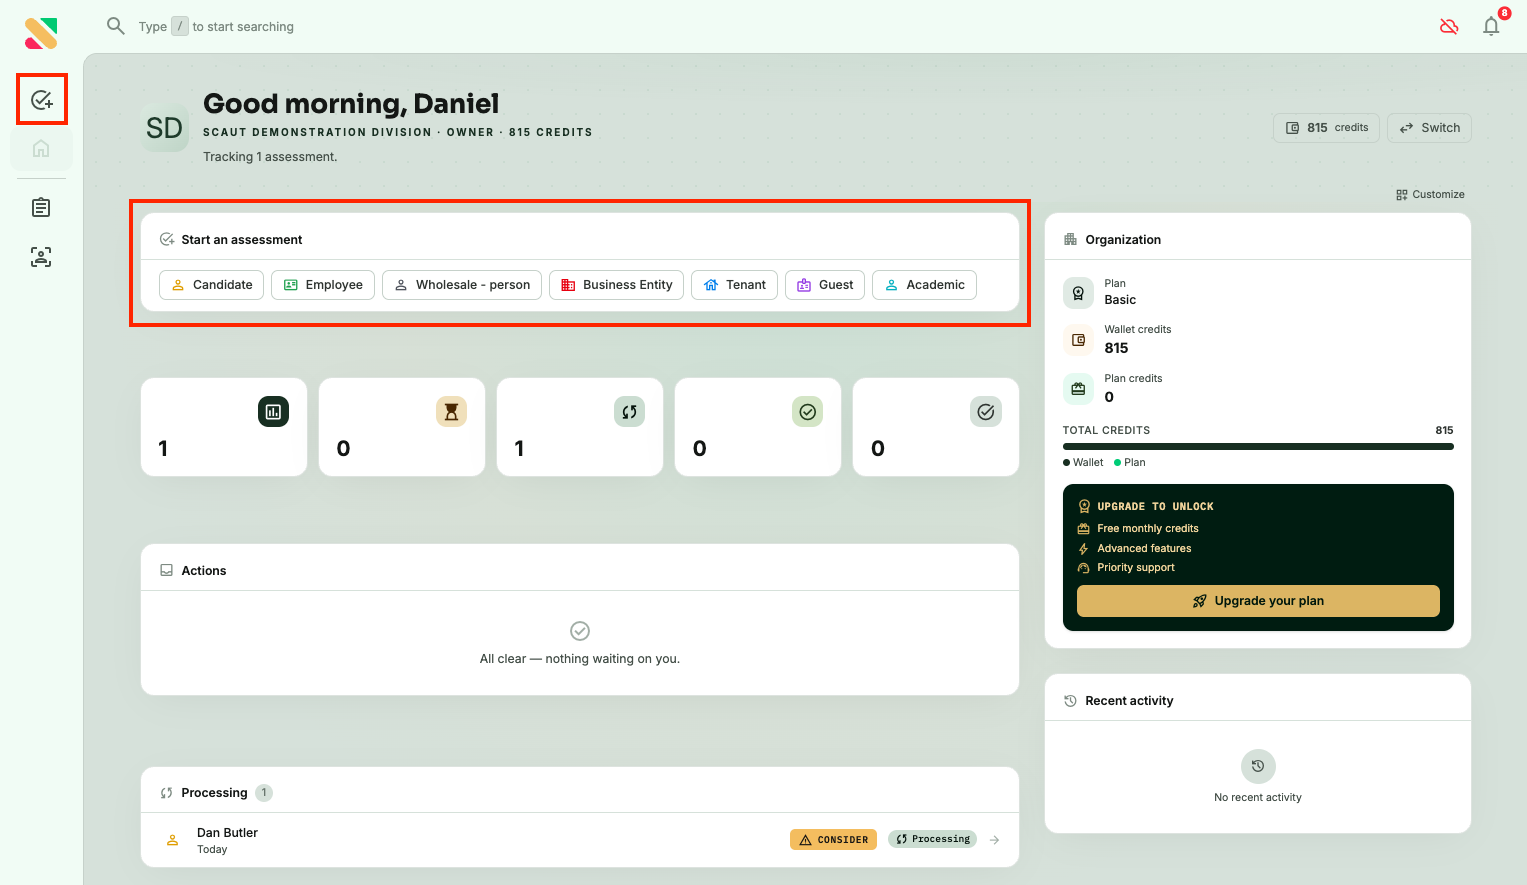
The available subject types are Candidate, Employee, Business Entity, Tenant, Guest, and Academic. Each type is tailored to a different screening use case (for example, Candidate is for job applicants, while Employee is for ongoing checks on existing staff).
For our example, we'll select Candidate.
Step 2: Choose the scope
The Scope step is where you define the 'What' of your check, you have two options:
- Pick a package. Packages are predetermined bundles that define the country focus, time depth (for example, residence history covering the last 5 years), and the specific checks that will run. They are the fastest option when you have a standard screening profile. You can select your favourite packages and they will be the top options.
- Pick scopes. Scopes are categories of checks (for example, Financial, Sanctions and watchlists, Education verification, Employment verification). Use Scopes when you want to build a don't need a Package.
With the Business or Premium subscriptions you are able to create custom packages of your most frequent checks, saving time and effort!
You can also enable the Purchase all available products toggle to skip individual product selection and include everything available for the selected Scope.
For this example, we'll pick the Financial and Sanctions and watchlists Scope.
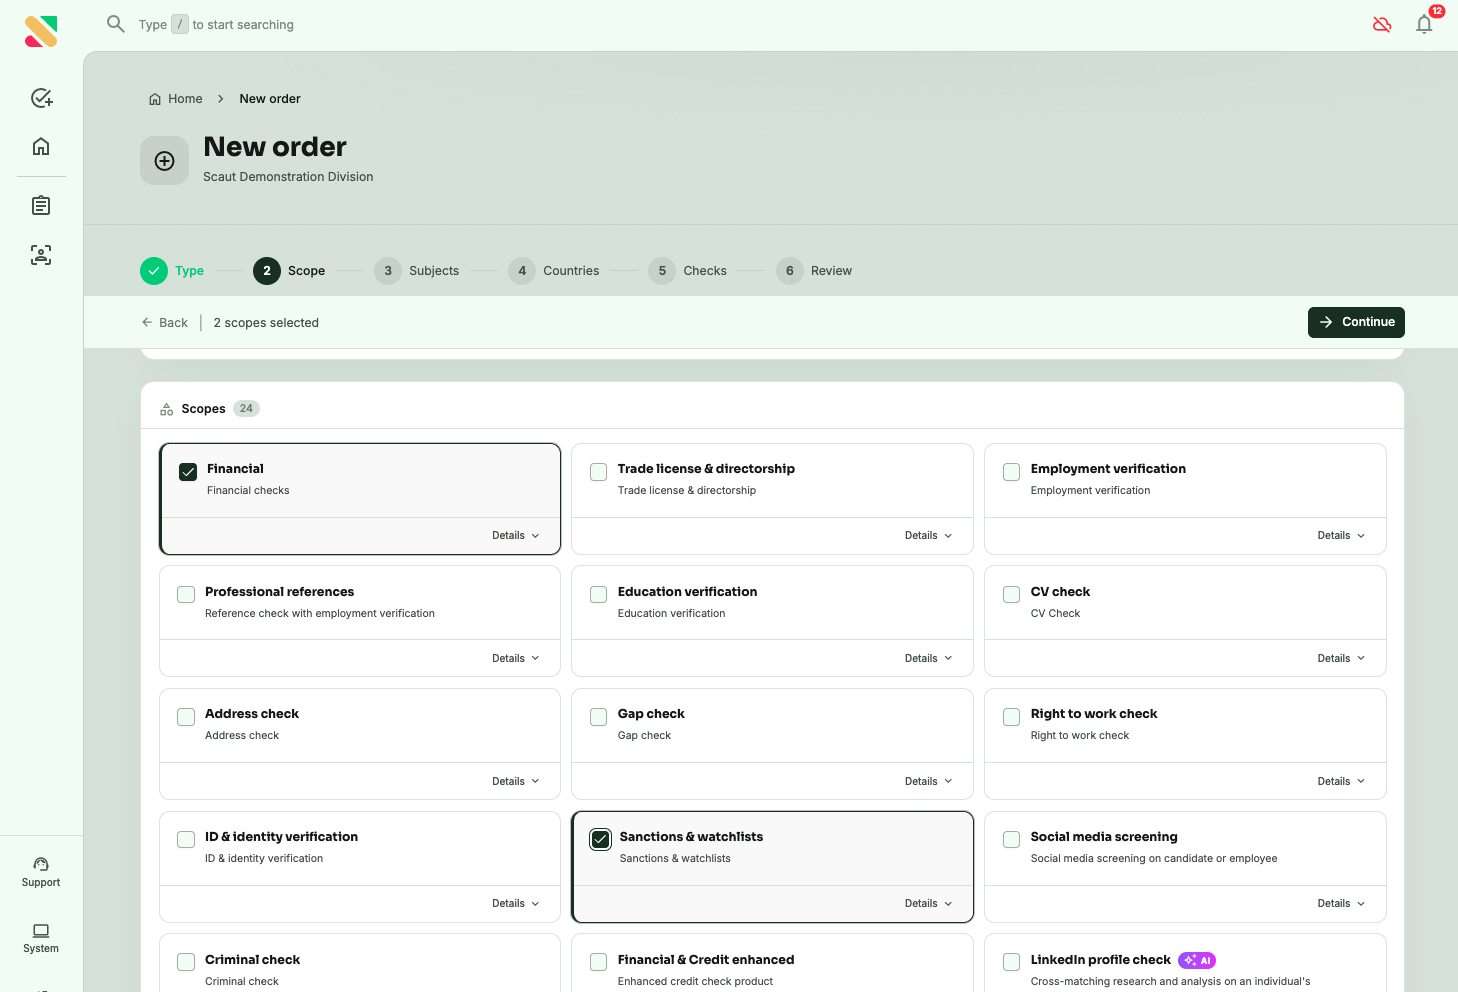
Note on dependencies. Some checks rely on others to work. For example, a Gap check needs Employment verification to be in scope, so selecting Gap check will auto-select Employment verification for you.
Step 3: Enter subject information
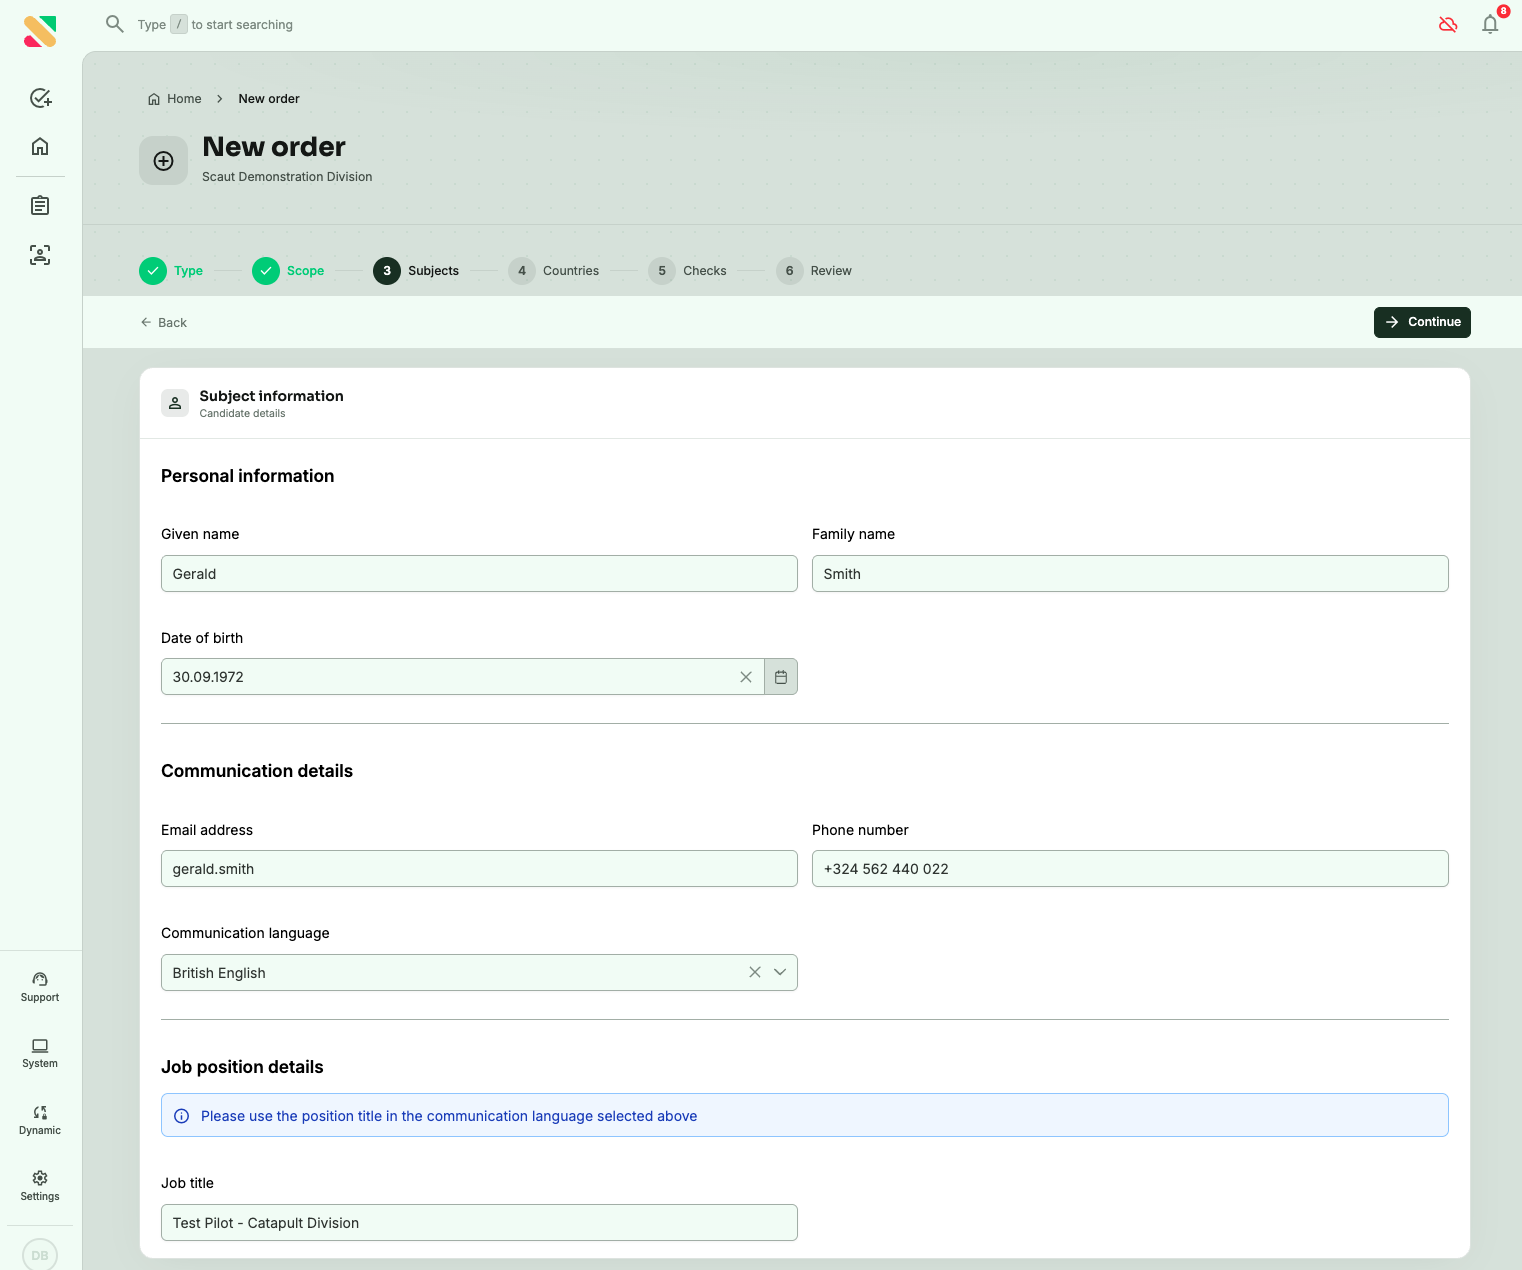
The Subjects step defines the 'Who', fill in the candidate's details:
- Personal information: given name, family name, date of birth.
- Communication details: email address, phone number, and communication language. The communication language drives any messages or questionnaires the subject receives.
- Job position details: job title and related fields. Create the position title in the same language you selected for communication, as this may be used in communications templates later with the subject.
- Some screenings will need to involve the subject, and in this case the Invite the subject toggle will be automatically selected.
If you don't have all the subject's details, toggle on Invite the subject. Scaut will email the subject a questionnaire so they can fill in their own information.
Communication details and job description are not important unless you are planning to involve the subject in the order process
Step 4: Select countries
On the Countries step you decide the 'Where' of your checks.
You have two ways to set this:
Default countries
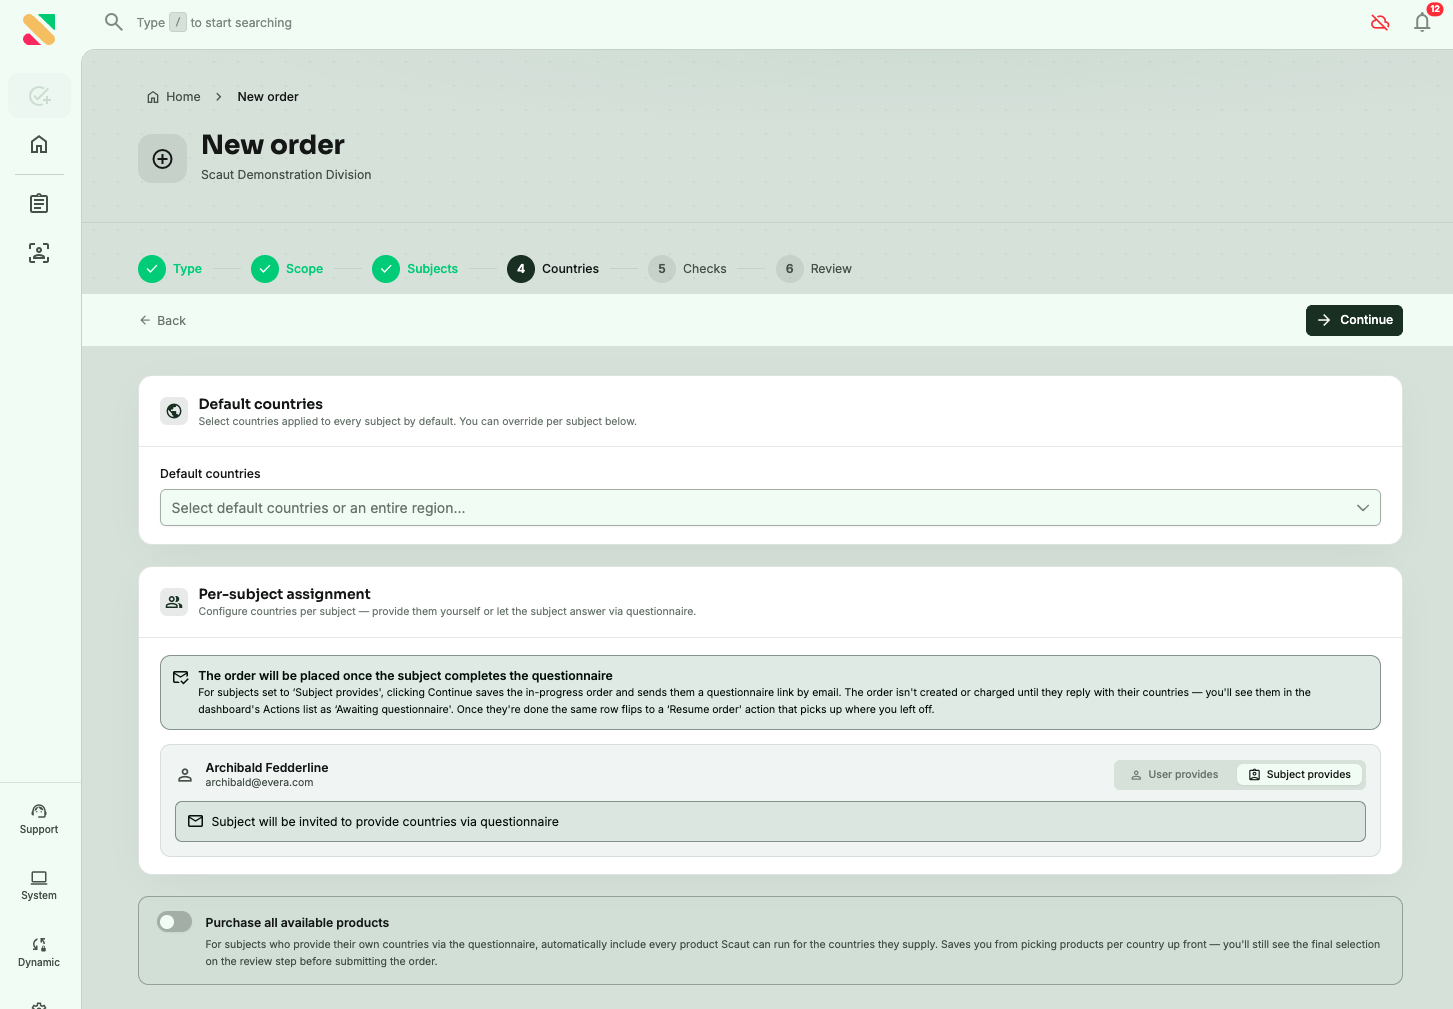
The top panel sets the countries that apply to every subject in this order by default. Pick one or more countries, or select an entire region. Think of these as the starting point. You can override them for individual subjects in the next panel.
Per-subject assignment
This is where you decide, for each subject, how the countries get filled in. Every subject row has two modes you can switch between:
- User provides is the default. You set the countries for this subject yourself, either inheriting from the defaults above or picking specific ones.
- Subject provides hands the question to the subject. Scaut emails them a questionnaire and asks them to specify the countries themselves. Use this when the subject's screening profile depends on personal history you don't have up front (countries they've lived in, worked in, or studied in).
What happens when a subject is set to "Subject provides":
- Clicking Continue saves the order as in-progress and sends the questionnaire by email. The order is not created or charged until the subject responds.
- While you wait, the order appears in your dashboard's Actions list as Awaiting questionnaire.
- Once the subject completes the questionnaire, that row flips to Resume order. Click it to pick up where you left off, complete the Checks step, review, and submit.
You can mix modes in the same order. Some subjects can be on User provides while others are on Subject provides, and the order will wait only on the ones it needs to.
Purchase all available products
This toggle works alongside Subject provides. When it's switched on, any subject who returns countries via questionnaire will automatically have every product Scaut can run for those countries added to their order. It saves you from manually selecting products for each country combination, which is especially helpful when you don't know in advance what countries the subject will return. You still get to see the final product selection on the Review step before submitting, so nothing is locked in without your sign-off.
For this example, we'll select Czechia, Germany, and Poland.
Step 5: Choose the individual checks
On the Checks step, pick the specific verification products you want to run. The list is filtered to what's available in the countries you selected.
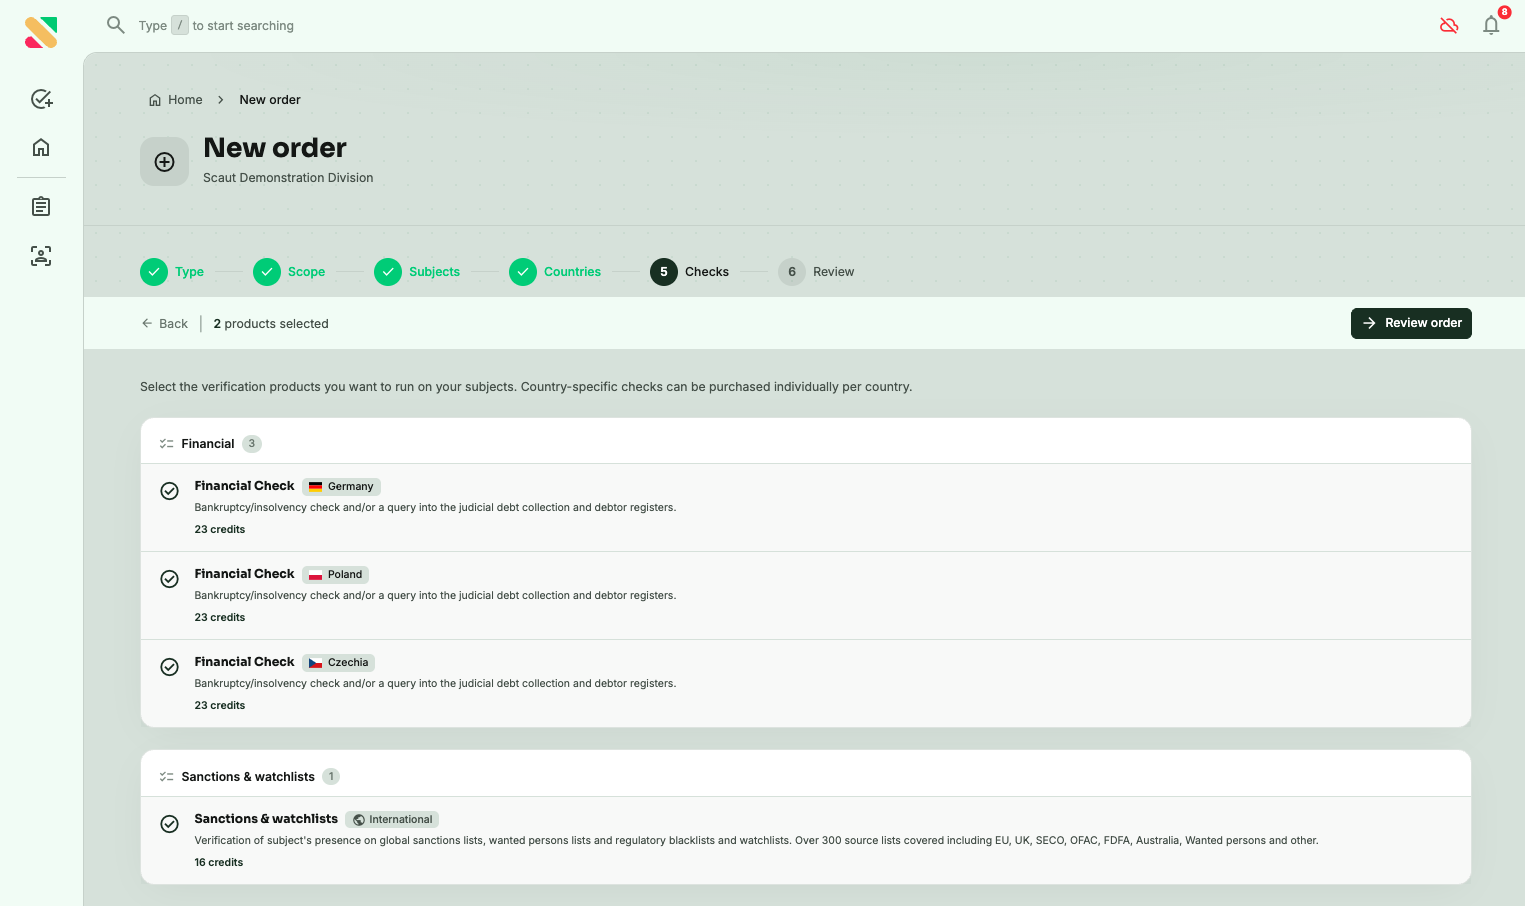
A few things to know about how checks behave:
- Country-specific checks (like Financial Check) appear once per selected country, each priced separately. In our example, you'll see Financial Check available for Czechia, Germany, and Poland.
- International checks (like Sanctions and watchlists) run across all locations under a single product and a single price.
Tick the checks you want and click Review order.
Step 6: Review and place the order
The Review step gives you the full picture before you commit:
- Order summary: the subject type, the subject's details, and the products selected (with country flags where relevant).
- Cost breakdown: each check itemised with its credit cost and a total at the bottom.
- Consent: a required checkbox confirming you've obtained the subject's consent to process their personal data in line with GDPR and applicable local regulations.
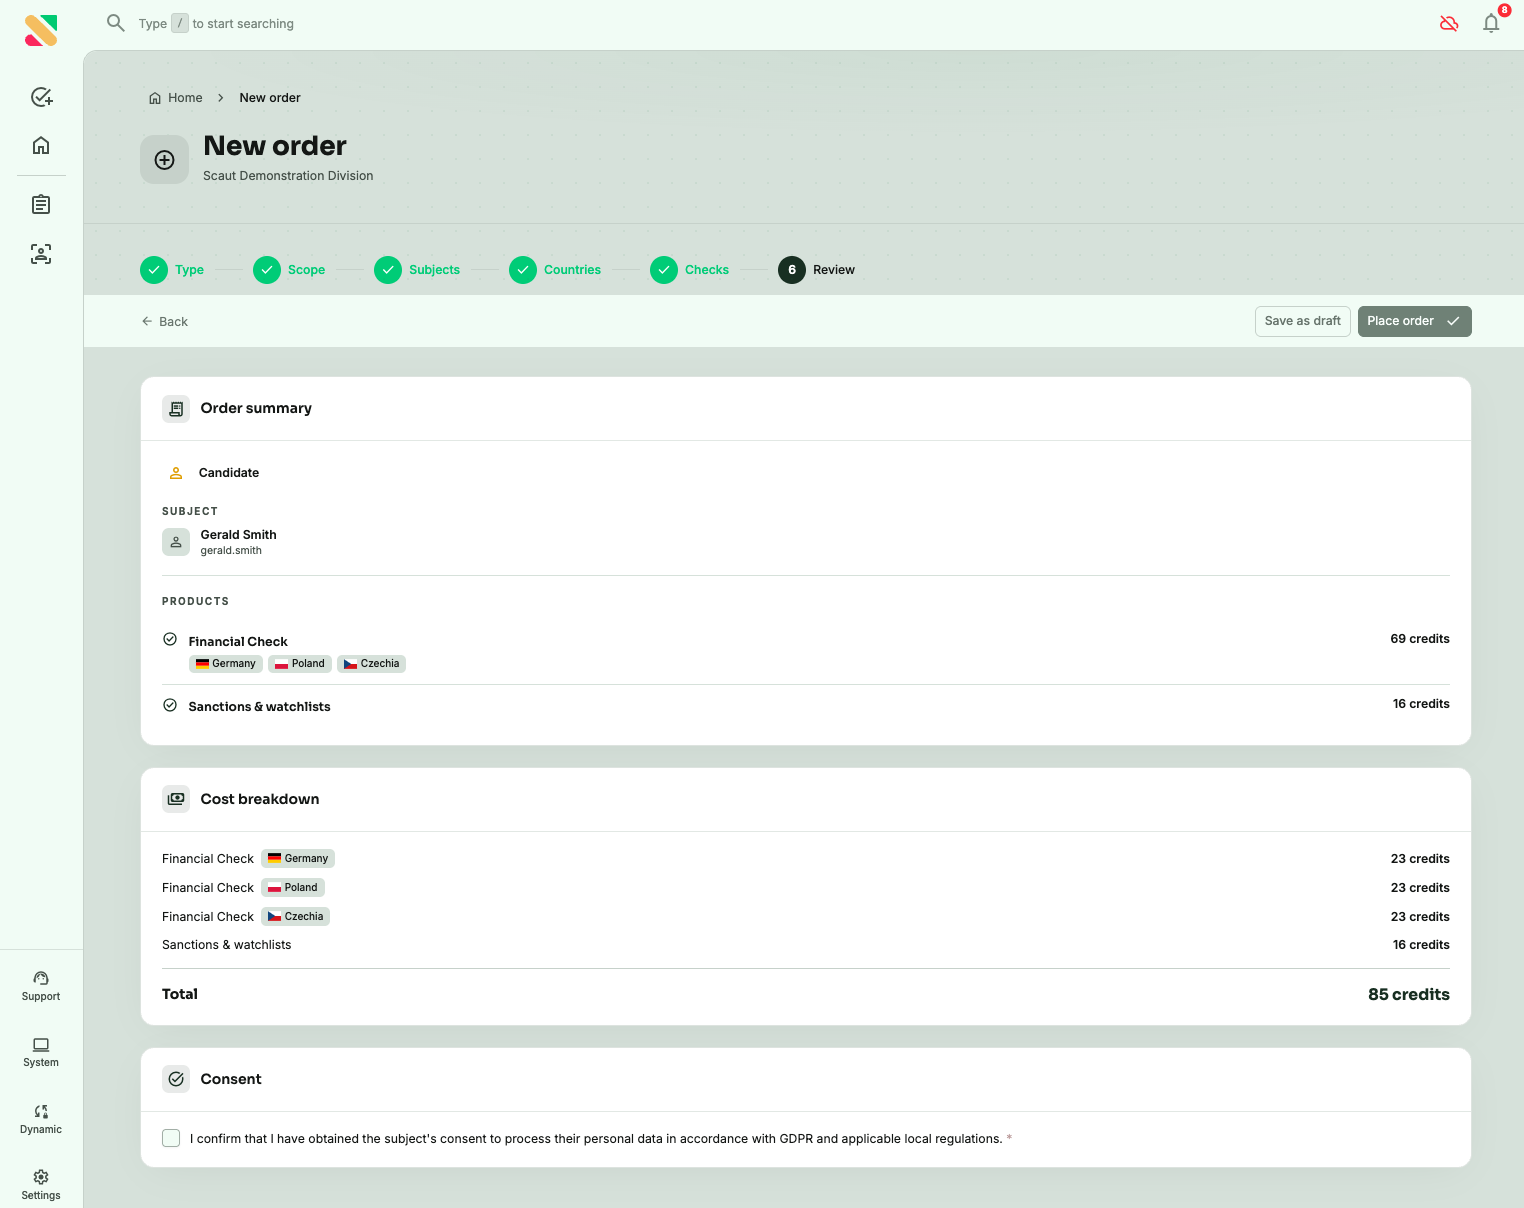
Tick the consent box and click Place order to submit. If you'd rather come back to it later, click Save as draft instead.
If you let the subject pick the countries earlier, you'll re-enter the order (from your dashboard) at the Checks step once they've responded. From there you complete the check selection, review, and place the order as above.
That's it. Once placed, the order moves into your dashboard where you can track its progress and review results as each check returns.